PrestaShop 1.4 Module Positions Tutorial
How to change the positions of modules in PrestaShop
In this tutorial we'll show you how to move modules to different positions in PrestaShop. This concerns mainly the modules that are displayed on the frontend of the store, and especially those in the left and right columns. As an example we'll use PrestaShop with the default theme and modules that come with the installation package. The module positions are also referred to in PrestaShop as hooks.
To switch module positions, log in to the backend of your store, click on the Modules tab and then on the Positions sub-tab. On the page that opens you'll see many tables, each table labeled with the name of the position: e.g. Payment, Right column blocks, Left column blocks, Home page content, etc.
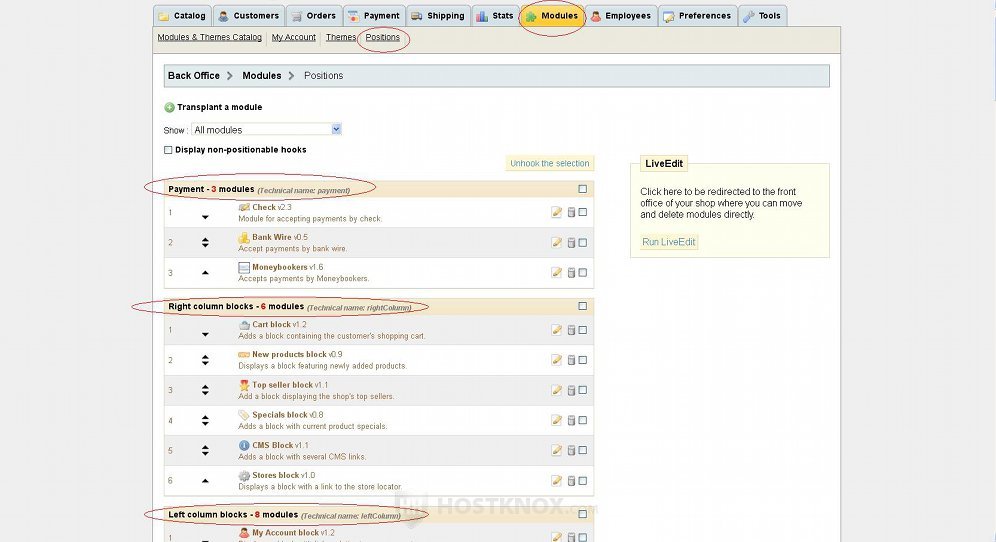
You'll notice that in each position (hook) there can be many modules listed in numeric order (some positions are empty). For example, by default the Right column blocks position has six modules listed in it. The modules in it are listed in the order in which they are displayed on the frontend. For example, Cart block is in first place which means that it's closest to the top of the page, while Stores block is the last in the list, which means it is closest to the bottom of the frontend page.
You can very easily change the order of these modules within the position. To do this you can use the arrows in front of the names of the modules:
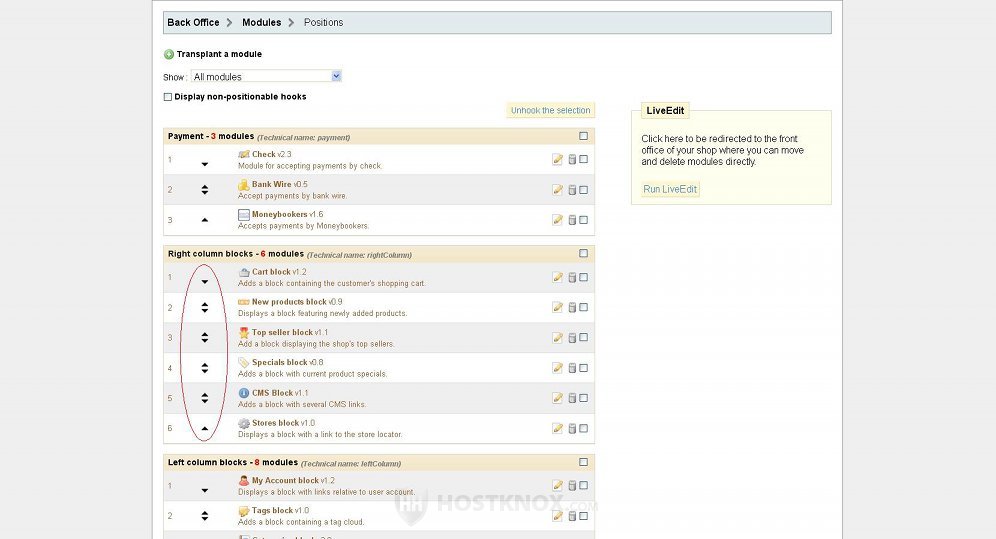
You can also place the mouse pointer between the name of the module and the above mentioned arrows; the pointer will turn into a cursor with four arrows. When this happens click the left mouse button and hold it, then drag the module up or down the list to the place within the position (hook) where you want the module to appear. The row of the module will become orange while you're moving it.
You can delete the module from that position altogether by clicking on the delete icon; it looks like a trash can. This will only remove the module from the position (hook). It won't change its status as installed, enabled, etc. However, if, for example, you remove the Stores block from the Right column blocks position, it will be removed from the frontend's right column, despite the fact that the module is still installed and enabled.
You can add a module back to a position from which you have removed it earlier, or generally you can add modules to a position whether or not they have been in the particular position before. In PrestaShop this is also referred to as transplanting a module.
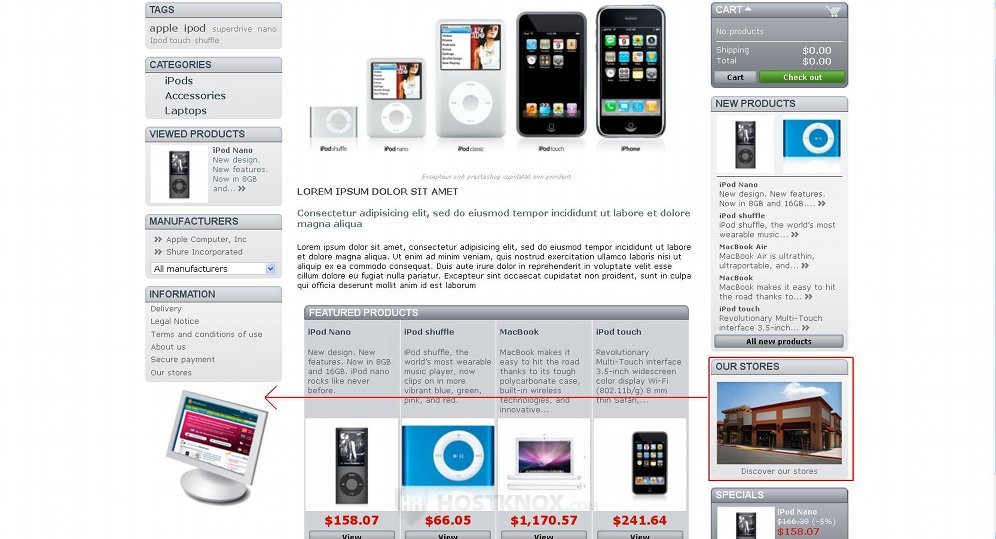
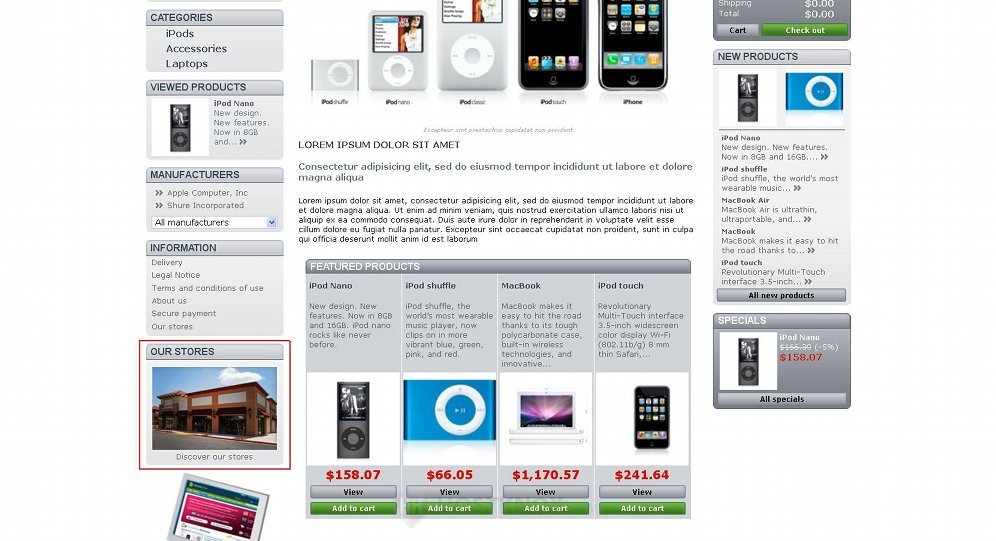
We'll illustrate how to transplant modules with an example. Let's say that we want to move the Our stores block (Stores block module) from the right column of the shop's frontend to the left column, right under the Information block:
So, first we log in to the backend of the store, we click on the Modules tab and on the Positions sub-tab. Then we delete the Stores block from the Right column blocks hook by clicking on the delete icon:

After that we have to transplant the Stores block module to the Left column blocks position. To do this we click on the Transplant a module button which is in the upper left corner of the Positions sub-tab page, right above the lists with the different positions. On the page with the settings that opens after we click on the button, we select Store block from the Module drop-down menu, and from the Hook into drop-down menu we select Left column blocks:
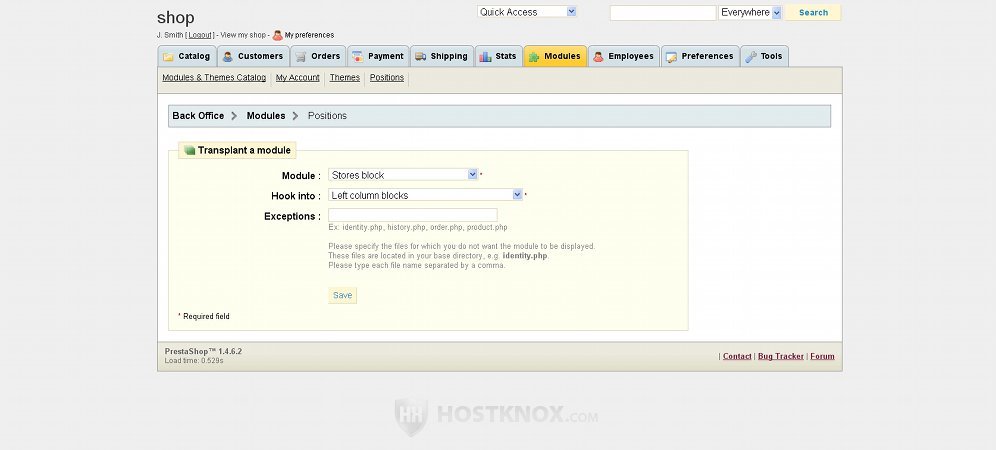
Then we click on the Save button.
The module will be added to the position. However, it will be at the bottom of the list and we want it to appear right under the Information block on the frontend of the site. So we move the Stores block within the Left column blocks position by dragging it under the CMS Blocks module (CMS Blocks is the module that displays the Information block on the frontend). We already described how to move a module within a position (hook).
The last thing to do is to refresh the frontend of the store to see the result:
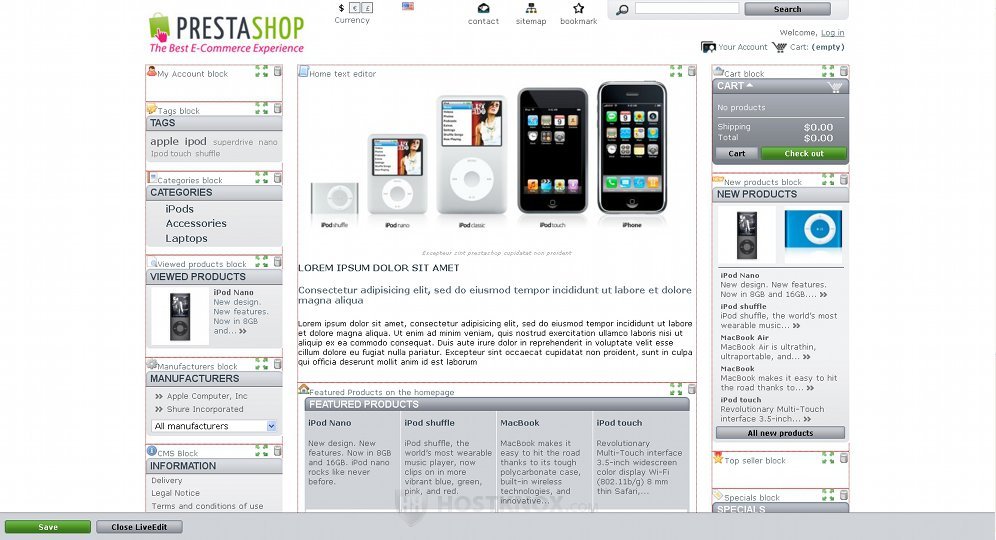
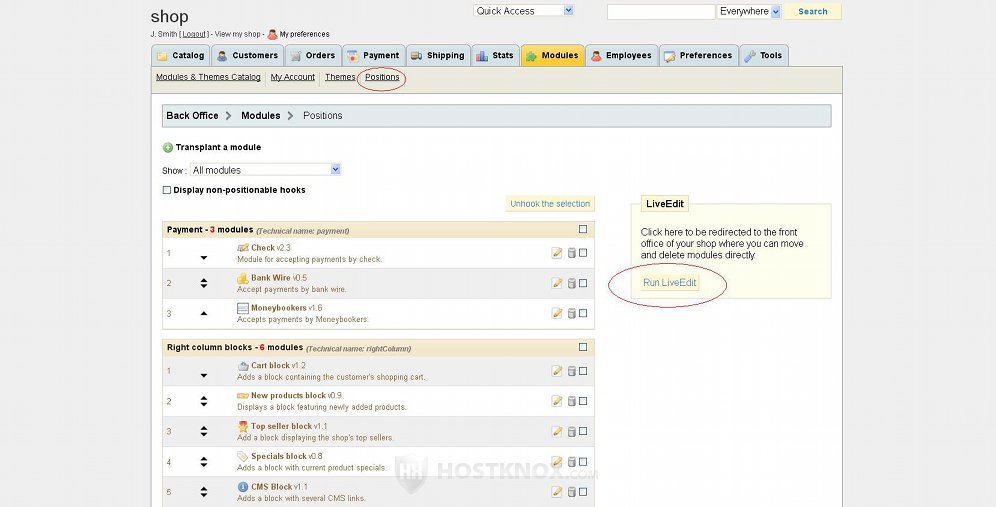
There's also another way to change the positions of modules: Live Edit. To use this method, on the Positions sub-tab page of the admin panel click on the button Run LiveEdit:
When you click on the button you'll be taken to the frontend of your store. The modules will be shown with red dotted lines. They'll be labeled with their names and next to the name there should be two icons. The icon that looks like four arrows is for moving the module. Just click on it with the left mouse button, hold it and drag and put the module in the desired position. The trash can icon is for removing the module from that spot.
After you're done click on the Save button in the lower left corner of the screen to save the changes or on the Close LiveEdit button to close the live edit without saving: