PrestaShop 1.4 Customers Tutorial
How to manage customers in PrestaShop
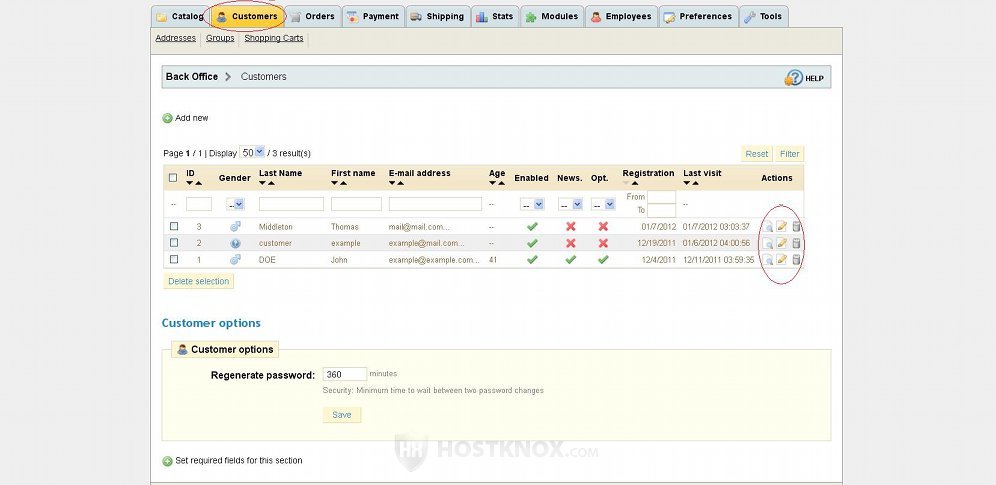
You can manage customers from the backend of your PrestaShop store. After you log in click on the Customers tab. On the page that is displayed you'll see a table with all the customer accounts. To view details about an account, to edit or delete it, click on the corresponding button in the table:
You can edit the accounts of any of your customers. To do this click on the edit icon (a pencil) for that account. This will display the general settings of the customer's account:
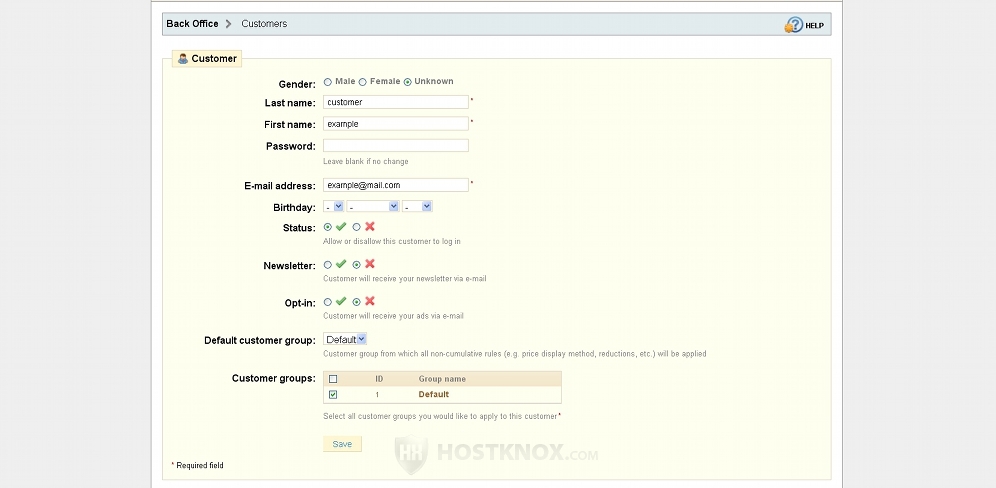
You can change the customer's name, password, email address, etc. From the Status option you can disable the account altogether. You can subscribe the customer to your newsletter, and also send him/her ads (Opt-in option). You can change the customer's default group and you can also put the customer in a customer group that you have previously created (e.g. a customer group with special discounts). If you make any changes, don't forget to click on the Save button.
From the Customers tab page you can also directly create new customer accounts. To do this just click on the Add new button that's above the table with the accounts. Then configure the options that appear; they are the same as the ones on the account edit page (shown on the screenshot above).
In the table on the Customers tab page there's also a "view" button (a magnifying glass) for each customer account. When you click on it you'll be able to see detailed information about the customer and his/her activity on your site. At the top of the page you can see personal information about the customer (e.g. name, email address, age, registration date, etc.). In the top right corner of the sections with the personal information there's an "edit" button which will redirect you to the edit screen for the account:
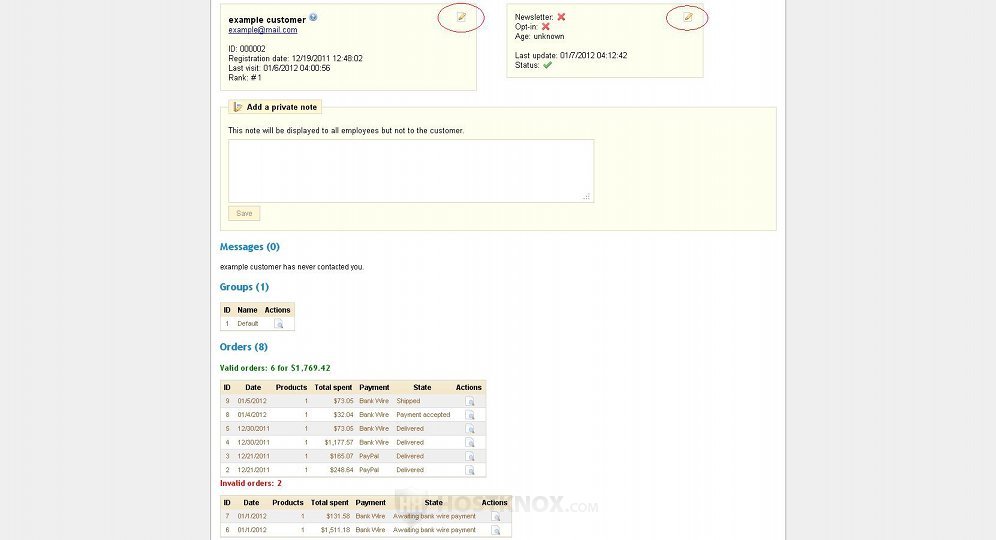
Under these two sections on the "view details" page there's a text field in which you can add some important information about the customer. The customer won't be able to view this information; it will be accessible only to you and your employees (if any). On this page you can also view the customer's messages and the orders that he/she has placed; both orders for which payment has been accepted (valid), and orders for which you're still awaiting payment (invalid).
Down the same "view details" page there's more information about the customer's activity on your site:
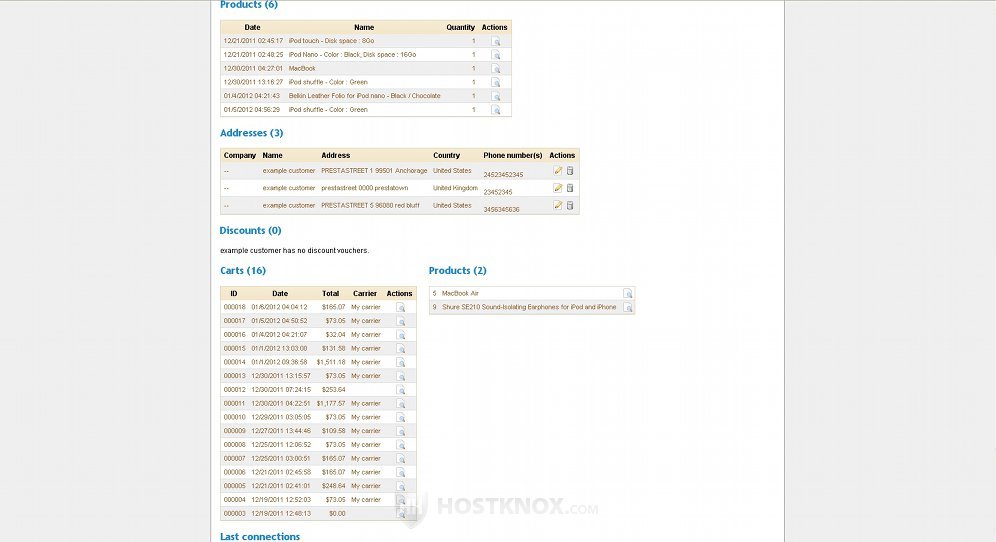
There are several sections: Products, Addresses, Discounts, Carts, Last connections. In these sections you can see all the products the customer has purchased, the addresses that they have added, discount vouchers (if any), all the carts, and a list of the last visits of the customer on your site.
Back on the Customers tab main page there are a few other things that you can do. Under the table with the customer accounts there's a section labeled Customer options. In that section there's an option from which you can change the time that has to pass before a customer's password can be changed. Below this section there's a button Set required fields for this section. When you click on it a list with field names will appear. By default, the checkboxes in front of the field names are not marked:
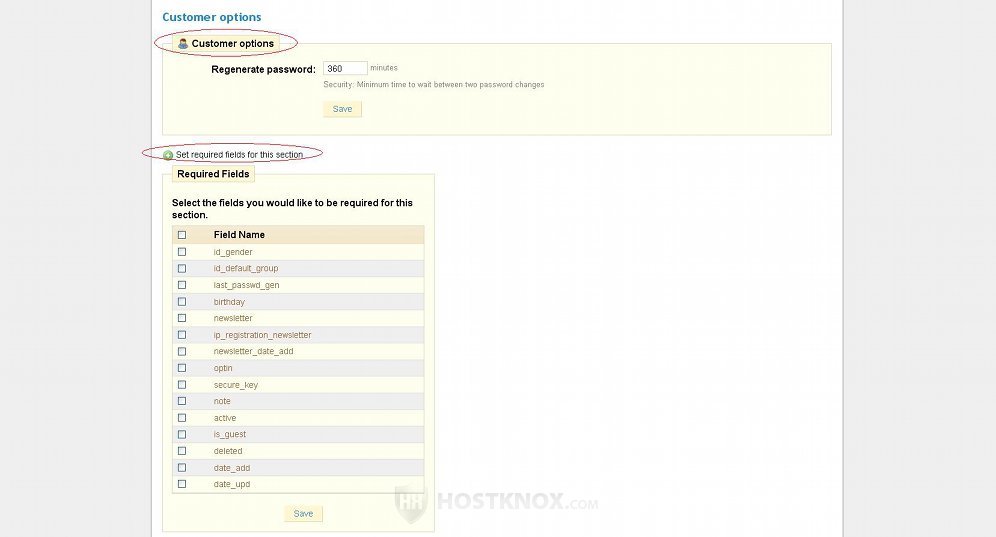
To make a field required simply mark its checkbox. In this way, the field will be required when someone wants to create an account on the frontend of your site (or when you add an account from the backend). There are fields that are required anyway; they are marked with a red asterisk in the subscription form. From these options, however, you can make other fields required. For example, when a customer creates an account they are not required to provide their birth date by default. If, however, you mark the checkbox for the field birthday in the Required Fields list on the Customers tab page of your store's admin panel, the customer won't be able to create an account without specifying his/her birthday in the subscription form:
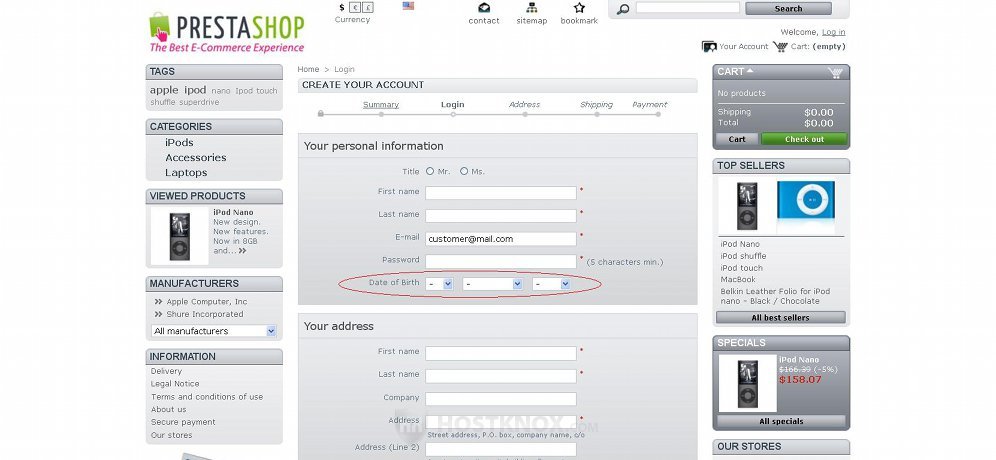
The field will be required even though it's not marked with a red asterisk as the fields that are required by default.
The Customers tab of your admin panel has a few sub-tabs: Addresses, Groups, Shopping Carts. When you click on the Addresses sub-tab you'll see a table with all the customers' addresses (one customer can have many addresses).
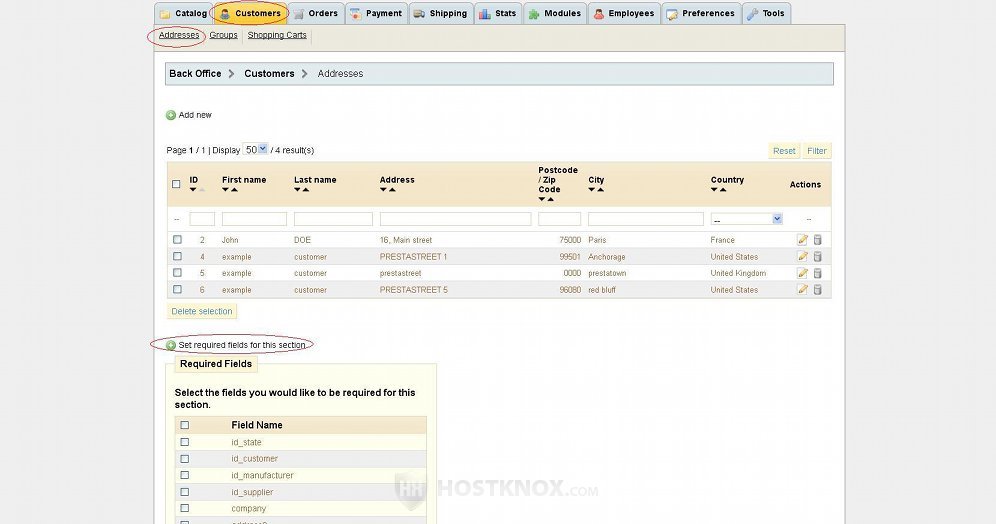
As usual, to edit or delete an address click on the respective icons in the table. To add a new address click on the Add new button.
Below the table there's a button Set required fields for this section. When you click on it you'll see a table with field names. This option works in the same way as the one on the Customers tab main page. The only difference is the fields. Here, for example, you can make required the fields for the second address or for the mobile phone number (these fields are not available on the Customers tab page).
From the Groups sub-tab of the Customers main tab you can create customer groups:
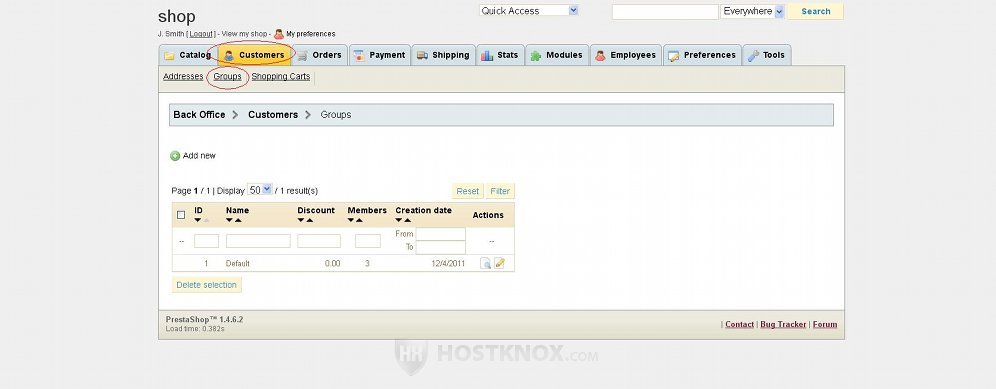
By default, there should be one group called Default; it includes all the customers. To add a new customer group click on the Add new button and configure the options. For some more information on this you can also check out the article on adding customer groups in PrestaShop.
From the Shopping Carts sub-tab of the Customers tab you can view your customers' shopping carts. When you click on the sub-tab a table with all the carts will be displayed:

The table includes all shopping carts: both those that were checked out, and those that were not. The shopping carts that were checked out (the order was placed) have a number in the Order ID column of the table. The products in the other shopping carts were not purchased; for example, a customer put a product in his/her shopping cart, but then changed his/her mind and removed it (in this case the shopping cart is also displayed in the table).