PrestaShop 1.4 Product Customization and Attachments Tutorial
How to add customizations and attachments to products
In PrestaShop you can offer customers the possibility to customize the product, and you can also attach files to the product. You can do this from the settings of the particular product.
Log in to the backend of your store, click on the Catalog tab, locate the product and click on its edit icon (a small pencil) to open the settings page for that product. From the tabs with the settings for the product the ones you need are the last two: Customization and Attachments.
Customizations
To add customizations to the product click on the Customization tab:
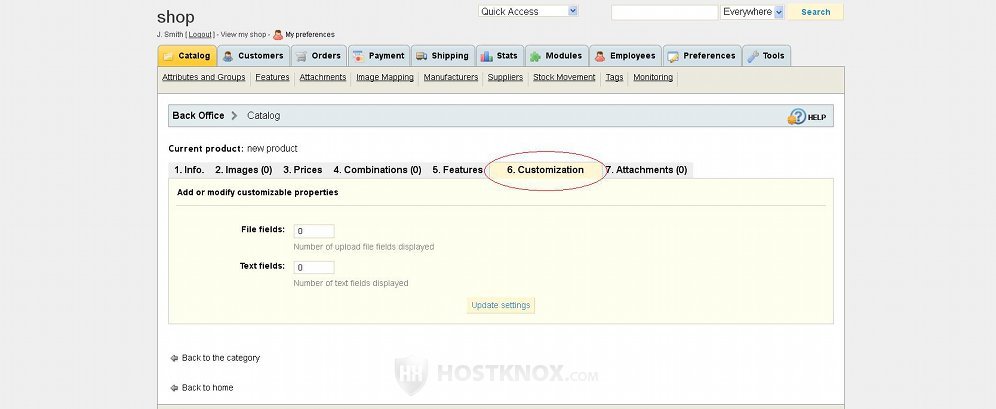
On the page that opens there are two options: File fields and Text fields. Each is set to zero by default. The number in the fields for the options indicates how many fields will be displayed on the product page (on the frontend of the store). For example, if you want to add one file field, type 1 in the field for File fields and click on the Update settings button. After you do it another option will appear under the Update settings button. In the field for that option you can type some text (e.g. Upload an image) that will be displayed on the frontend below the field itself.
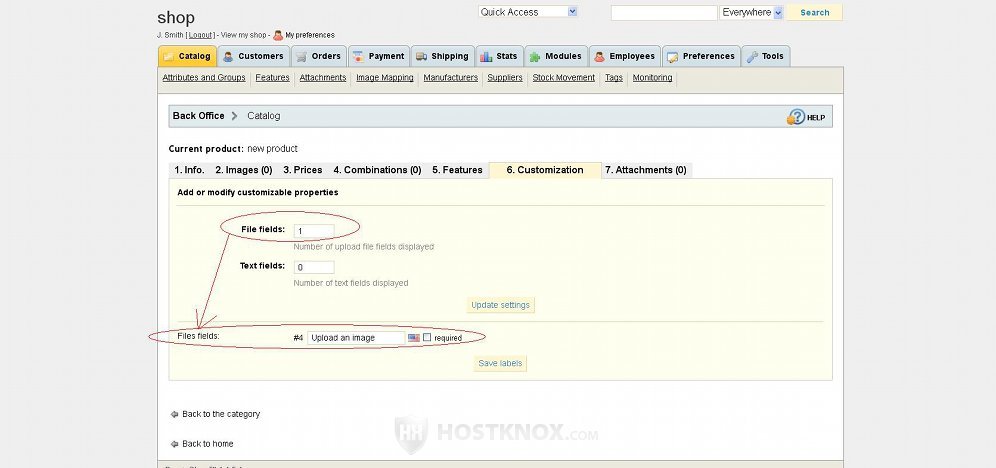
If you want the field to be required, mark the respective checkbox. In this way the customer won't be able to add the particular product to the cart, if he/she hasn't uploaded an image. After you configure the second option for the custom field click on the Save labels button. The Text fields option is configured in exactly the same way. The difference between the two is that the file field is for uploading images and the text field, as the name suggests, offers the customer the chance to type some text. The allowed image formats that customers can upload are JPEG, PNG and GIF, and the allowed file size of pictures uploaded by customers in PrestaShop is 131 Kb (kilobytes).
Customizations are useful if you want to offer unique products. For example, if your store specializes in T-shirts, you can offer the customers the chance to send you an image or a text that you can stamp on the ordered T-shirt.
Attachments
From the Attachments tab of the product settings page you can upload files relevant to the product. For example, if you want to offer some additional documents, instructions, etc. that the customers can download from the product page, they'll be able to download the file(s) freely, without having to order the product before that.
To add file attachments click on the Attachments tab of the product settings page:
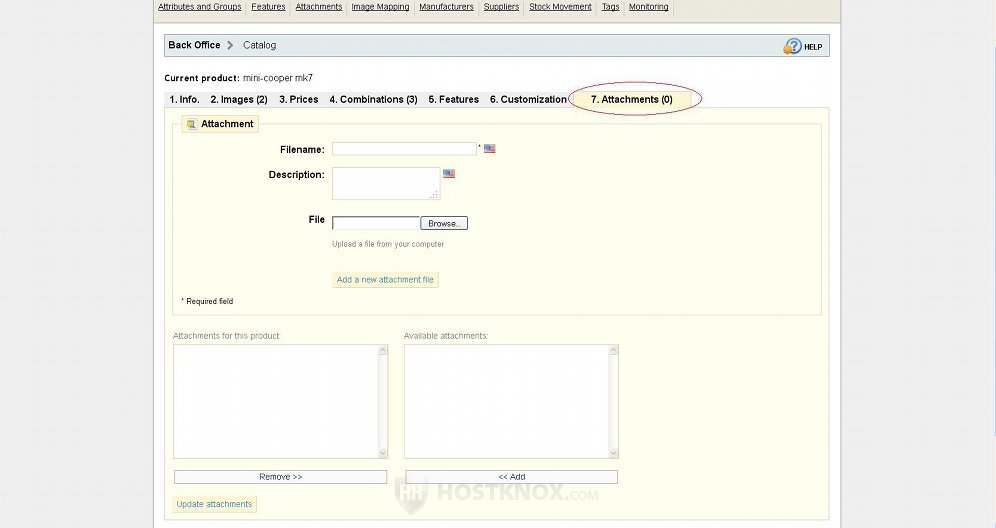
On the page with the attachment settings type in the field for Filename the name that you want to appear on the frontend of the store. In the field for Description optionally you can include a short description. Then click the Browse button to locate the file on your local computer, and click on the Add a new attachment file button to save the options and upload the file to your PrestaShop hosting account.
On the same page with the attachment settings the file will be listed under Available attachments, which means that it's uploaded to your account, but it's not visible on the frontend, and hence customers can't download it. To make it available for downloading, select the attachment and click on the Add button. The file will be listed under Attachments for this product. Then click on the Update attachments button in the lower left corner of the page, and customers should be able to download it from the product page of your store's frontend.
All the attachments that you upload, no matter from the options of which product, will be listed as available for each product. This means that every product that you edit will have these attachments listed in the settings of the Attachments tab. The attachments will be available for downloading on the frontend only for those products for which you specifically include the files in Attachments for this product.
From the Attachments tab of the product settings page you can't delete the uploaded attachments or edit their options. To do this click on the Catalog tab of the admin panel and then on the Attachments sub-tab. This is a different Attachments tab. It's a direct sub-tab of Catalog, while the other Attachments tab is only visible when you edit the settings of a product.
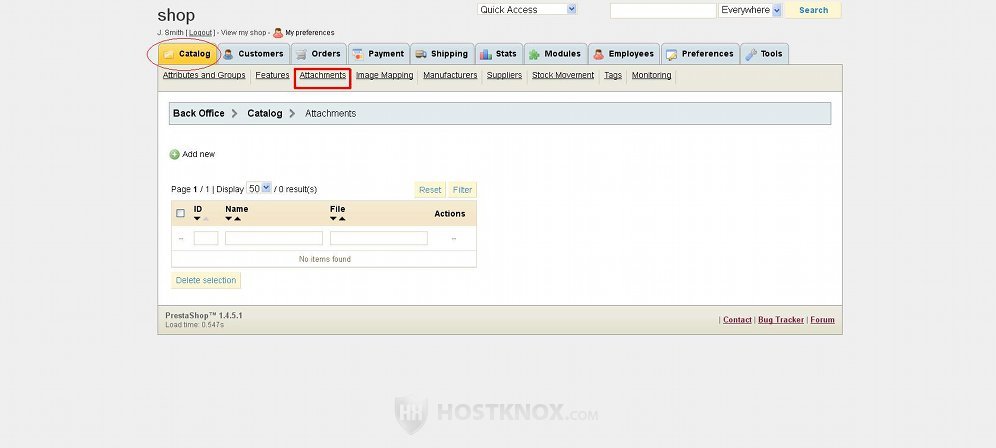
On the Attachments sub-tab page you'll see listed in a table all the attachments. You can delete them or edit their options by clicking on the respective icon.